Antlers can be one of the most striking features of a character. Crafting a custom set of antlers for cosplay can be key to making your entire costume come together. Take for example the Forest Spirit from Princess Mononoke: The tree-like crest of antlers atop the Forest Spirit’s head are a huge part of what makes the character so recognizable. Even more traditional antlers for cosplay can be impressive, like those adorning the Headdress of a Forsworn Briarheart. And how about the antlers of the mighty Malfurion Stormrage? I could go on and on about a perfect pair of antlers for cosplay… I mean, everybody loves a great rack, amirite?
How do I make custom antlers for cosplay?
In this tutorial I’ll be going step by step through the process I used to create both the antlers for my Ancient Nord Armor helmet, and the single antler for my Dark Souls 3 Pyromancer Crown. I find this process is fairly affordable, easy to do from an in-home workshop, and can be completed with the basic tools and materials you likely already have in your arsenal. These antlers also turn out extremely lightweight, and are easy to secure to headbands, helmets, and other armor pieces. Let’s get started!

Tools & Materials Needed:
- Reference photo of your character or prop
- 16 Gauge Steel Wire
- 22 Gauge Steel Wire
- Clay sculpting tools
(A basic set is perfect. Just be sure you have a wire brush tool like this.)
- Water (and small ramekin or bowl that is easy to dip your fingers into)
- Base costume piece
- Duct tape
- Tin Foil
- Wire Cutters
- Pliers
(I prefer needle-nose)
- Creative Paperclay
(It is important to use Paperclay specifically – it is air dry and very light weight!)
- Hardware for mounting your antlers
**Optional Tools and Materials**
- Hot Glue Gun
- Small personal fan
(aids with the drying process)
Step 1: Consider Your Base and Mount
The best way to begin is with your inspiration. Keep your character’s photo in sight, and reference it often! For this tutorial, I’ll be making my antler for the Dark Souls 3 Pyromancer Crown. It’s basically a fancy headband with a single antler attached on near the left temple. Here is my reference photo:

Dark Souls 3 Pyromancer Crown, in game art on female model.
Having had a similar crafting experience with my Skyrim helmet, I decided to make my base using Worbla’s Finest Art. There are many ways to mold Worbla, but my preferred method is to simply double it up. This way my sheets are twice as thick before cutting and shaping the pieces. In certain spots, I added an additional double layer for support, for a total of 4 times the thickness.


To attach the antler, I decided on a 1/2″ one hole conduit strap as my mount. With this piece of hardware, I’m able to hide the curved side by building up the antler around it. The flat side then lies flush against the base headband, and is secured with a screw to the Worbla. For extra stability, I decided to use gorilla glue also. (I’ll show you the mounting process at the end of this tutorial!) If possible, now is a good time to mark your base where the mount will attach. This will ensure you keep the placement consistent as you create the antler.
Once you decide on your mounting material and base, you can begin constructing your antler around your mount!
From here on out, I will refer to the headband as my “base”, and my conduit strap as my “mount.”
Step 2: Cut and Shape Your Wire Pieces
In this step, we’ll be using the 16 gauge multi-purpose wire. Start by determining the length you want your final antlers to be. Be sure to add extra length to your measurements for securing the main wire to your mount, and to account for the natural curve your antler should have.

Use your 16 gauge wire for the main base of the antlers
For example, I wanted my overall antler length to be about 7”. To account for the curve, I added an extra half-inch of length. To account for wrapping it around my mount, I added an additional one and a half inches. This means my “main wire” piece was 9” long.
Continue by measuring wire pieces for all additional branches your antlers have. Be sure to add an additional 1/2” of length to each “branch wire” to account for attaching it in the next step. Remember, it’s always better to have a little extra room to work with. You can trim off any excess later. Here’s how my wire pieces looked laid out:

Diagram of extra length to add to each wire.
Then, shape each piece of wire to roughly match the desired final curve. This isn’t critical at this point, just a general close shape will suffice. We will go back to make them perfect at the end of the next step.
If you are making two antlers, repeat the above steps and reflect the curves to mirror one another.
Step 3: Attach Your Main Wire to Your Mount
Grab your main wire and mount. Using your pliers, wrap the extra 1.5” of wire you left on the bottom around your mount. The result will likely be a lose and wiggly connection, but that’s okay. From here you have a few options for firmly securing the wire to the mount.
Option #1: Solder
Depending on what material your mount and wires are, you may be able to solder them to one another. This is arguably the best way to attach the pieces when making antlers for cosplay, but may not work for you depending on what you have chosen for a mount. Plus, I don’t expect everyone to have a soldering gun lying around! My mount was made of stainless steel, so soldering did not work very well.
Option #2: Gorilla glue
I love this glue. If you have the time to wait for this to dry, it will hold strong even through moderate to rough handling. Just follow the instructions on the bottle, being careful not to get any glue on your skin. (Sidenote: don’t worry about “clamping” the two parts you are gluing. We are relying on the expansion of the glue to secure our wire.)
Keep in mind it will take time and TLC to use this method. You should plan to watch over your piece and keep it in position as this glue sets for at least 30 minutes. It is best to then give gorilla glue a full 24 hours to dry.
Option #3: Duct tape
Yep, good old fashioned duct tape will always to the trick. I went ahead and used the duct tape method for this tutorial since I felt it was the most within reach for everyone. Rip yourself a few thin strips of tape and wrap them around your main wire and mount tightly. Ta-da!

The photo above shows a sample of solder to connect your wire on the base (left), and a sample of using gorilla glue to connect your wire on the base (right). As you can see, there is no need to worry about this step looking pretty!
Below is a sample of how thick I like to rip my duct tape pieces. I typically divide a normal size roll of tape in to three horizontal strips.

Once your main wire is secured around the mount, double check it’s positioning and shape relative to your base. Remember, the “base” in my case is my headband. The easiest way to check positioning is to hold up the mount to your base (see photo below). My main wire just needed a little bending at the bottom to face it out away from the headband. I also bent my main wire at the top to create one half of the fork that ends this particular antler.
Repeat the beginning of step 3 for your second antler before moving on.

Step 4: Attach Your Branch Wires to Your Main Wire
Once both of your main wires are secured to the mounts and shaped to match one another, it’s time to attach each additional branch wire. Start by marking each main wire where you want the branches to connect.

Make a small loop at the bottom of each wire branch, and hook it around your main wire.

Now you can use the solder method or the duct tape method to attach each piece.
When using the duct tape method, it is best to wrap the tape in an “X” shape. This gives it stability from more than one side. Here is a series of photos showing steps to wrapping your wires with tape:

I actually like to use both the soldering and duct tape methods for some extra peace of mind! This is especially helpful when you need to really bend and twist the branch wires after connecting them. Below on the left are the finished solder connections, below right is the finished taped wire branches.


Once all the pieces are secured, check their positioning and shape against your base again. It may help to temporarily tape your mount to the base for this step. This will allow you to see how both antlers look when mounted next to one another on the base.
When you’re happy with both antler shapes, it’s time to move on to step 5!
Step 5: So Much Tin Foil!
The goal with this step is to build up the antler shape and thickness. We will have a few more layers to add after this step, so the thickness of your foil should actually be slightly thinner than you want the finished piece to be. Keep this in mind as you move through this step.
Rip strips of tin foil, and wrap them tightly around the wire base. One strip of tin foil will of course wrap around the wire base several times, making multiple tin foil “layers” per each pass. It’s best to do one full pass of tin foil over all parts of your wire before moving on to a second pass.


As you wrap more tin foil, be sure to squish it down as flat and tight around the wire as possible. In general, your antlers should be thick around the base, and taper out towards the tips. So continue wrapping the base after your tips are the correct thickness. I ended up making about 5 passes of foil for my Pyromancer Crown antler.

Be sure to do this to both antlers before moving on to step 6.

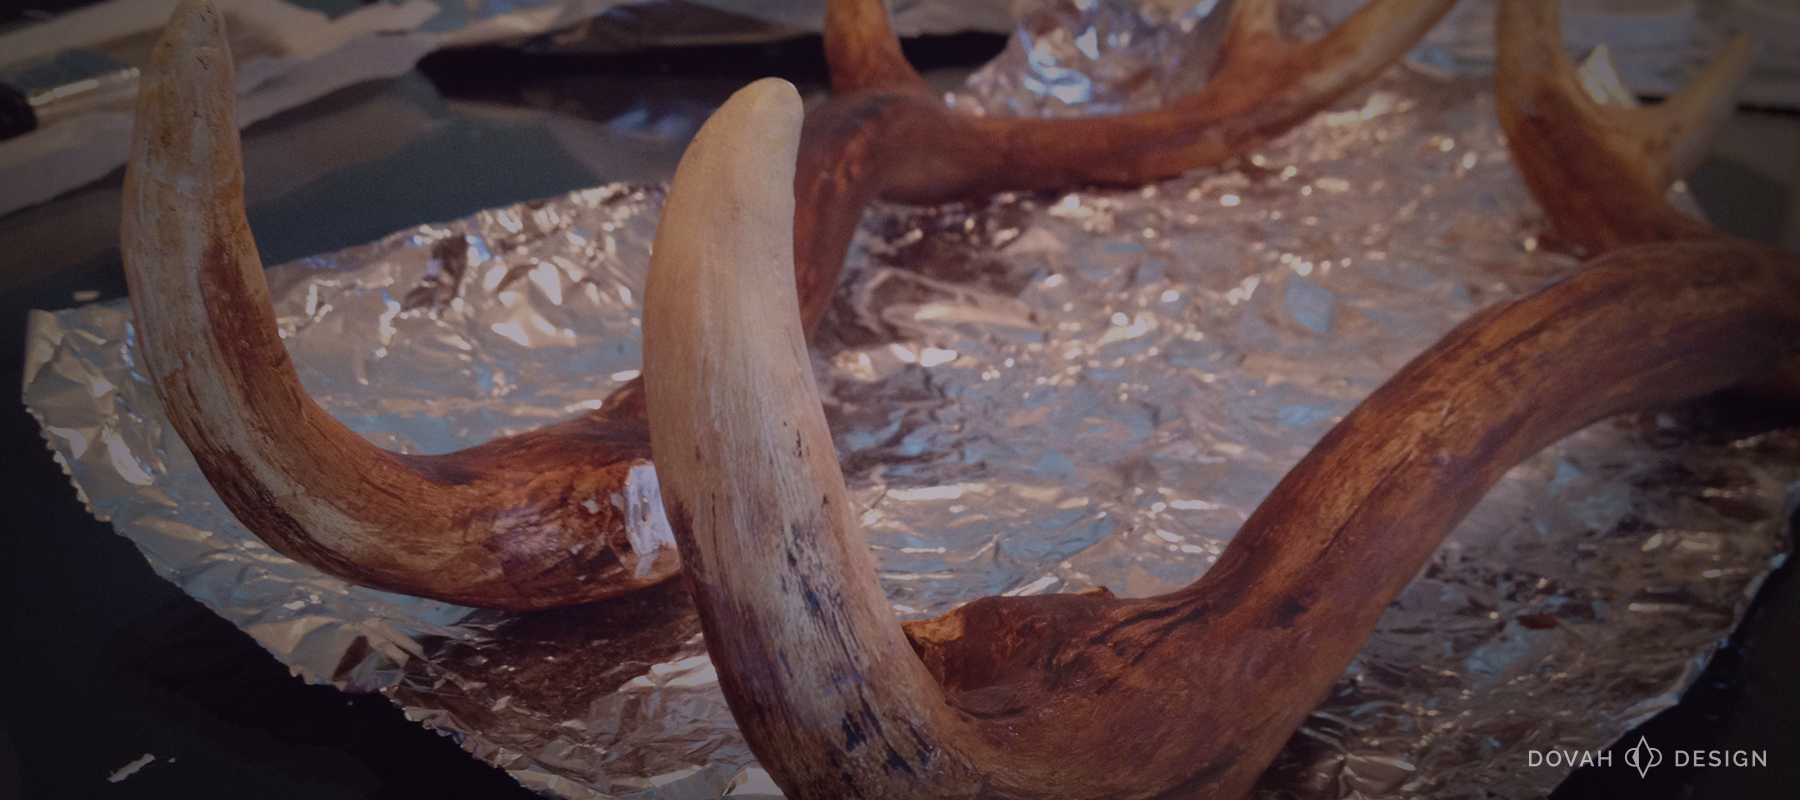
NOTE: During steps 5 and 7 it’s helpful to use a real antler as a reference. I happened to have a few antlers laying around my house, but this is definitely not required to make antlers for cosplay. A quick Google search for deer antlers will do the trick. This way, you can reference the natural tapers and shapes as you go.
Step 6: Wrapping in Wire and Duct Tape
Once your tin foil is looking good, it’s time to give the antlers some extra support. Grab your 22 gauge steel wire, and cut a long piece (exact length is not important, just a one you’re comfortable working with). Begin by making a few loops around your mount.

Continue by wrapping the wire up and around the tin foil antler. Each loop of wire should be anywhere from 1/2” to 1” apart. Your wire should be nice and tight, but not so much so that you rip the foil below or distort the shape. Remember, the tin foil underneath should already be pressed tight. You may need to go back and adjust the foil if your wire is affecting the shape.

If you get to the end of your wire piece, use your pliers to bend the tip of your wire at a 90-degree angle, and anchor it in the tin foil to hide the sharp end. You can also use this process to start a new piece of wire, or if you reach the end of an antler tip. Alternately, you can use a hot glue gun to cover the sharp ends of your wire.


Remember to do this to both antlers before continuing. Below is how your finished antlers should look once wrapped in wire:

Once you have wrapped all the branches with wire, begin covering everything with a single layer of duct tape. This layer helps to smooth out the overall surface and make it easier to apply our Paperclay. I like to rip thin strips, and work in small pieces from the tips all the way down the base. To keep the layers smooth, wrap a single strip of duct tape and cut off the excess so it does not overlap itself.

Do not wrap the duct tape too tight! As you can see below, the 22 gauge wire will show through if you wrap the tape too tightly. Aim to wrap the tape semi-tight so the foil is secure, but the wire beneath does not show through.

Here is how your final antlers should look once wrapped with the duct tape layer:

Step 7: Paperclay and Sculpting
Now it’s time to make these look like antlers! For this step, complete one entire antler before moving on to the second. Otherwise, your Paperclay may dry before you are able to complete the details.
Before you begin this step, it’s a good idea to clear some space on your work area and prep for sculpting clay. Grab your ramekin or bowl, and fill it with water. Gather your clay tools, get yourself a few paper towels (for cleaning your fingers), and consider setting up a drying station for your antlers. Remember, a clean workstation is a happy workstation!

Rip yourself a small ball of Paperclay, and start by applying it to the tip of an antler branch. This way, you can hold on to the base as you work, and the tips will be mostly dry by the time you are finished.
Wet your fingers in your water bowl, and use that to help smooth out the clay from the ends downward.

Continue by adding more clay clumps to the exposed parts of the antler. Then, with wet fingers, use a back and forth motion to smooth the Paperclay out evenly.


As you complete a branch, use your wire brush clay tool to begin adding texture to the clay. Gently touch the end of the wire brush to the clay, and pull back quickly to make shallow, straight grooves. It is good to try and vary your grooves as much as possible to keep the texture looking natural. I like to add a deep groove every now and then, and typically smooth it out with my finger so it isn’t super prominent.

As you continue to add clay, you may accidentally flatten parts of your texture – this is totally normal! Just be sure to go back and add in more texture to overlap the flattened sections as you continue. This should be done before the clay begins to dry.
If your clay becomes a little too hard to add in texture, just rub a wet finger over the surface to make it malleable again. Below is a sample of the texture after I completed the first portion of my antler. You can see toward the top where I added a deeper groove:

Continue to add clay and smooth out over the entire antler down to the base.
If the base of your antlers will be visible, move on to step 8 to sculpt a realistic base to your antler. If you will be hiding the base of the antler, skip straight to step 9.

Step 8: Sculpting a Realistic Antler Burr
In case you’ve never taken a close look at a real antler, the base is actually very bumpy. The bottom ridge that sticks out from a deer’s fur, called a “burr,” is especially rigid. In this step, we will be working to mimic a realistic burr.
Start by rolling out a thin, long piece of clay and wrapping it around the base of your antler. You’ll then want to smooth it out just slightly to form a natural taper. Now is also a good time to test how the clay and mount rest up against your base.


Once you are happy with the way the antler sits on your base, grab your clay tools and begin carving slight ridges in to the bottom stem of the antler. These should be smooth, but much more prominent that the texture we added with the wire brush earlier. I found it was also helpful to add tiny pieces of clay on top to build up a few natural looking ridges.

Smooth out these bumps so they look like small, bulbous protrusions. They may be a little rough for now, but that is fine! You can sand them down slightly once the Paperclay is dry. Be sure to make the ridges fade into the ridges you made on the antler base previously. It should look similar to this:

Step 9: Let it Dry!
Congratulations, friend! Your antler is complete. Allow your Paperclay layer to dry for at least 24 hours before sanding and painting.
This step sounds easy, but it can be difficult to set up your antler in a way that will not affect the clay layer. As I mentioned earlier, I like to start with the tips of the antlers so they are mostly dry by the time the rest of my clay layer is complete. This allowed me to set the antler down to dry like so:

I also prefer to have a personal mini-fan for this step. It helps the Paperclay set up quickly and evenly, but is not required.
Step 10: Mounting to Your Base
Depending on your piece and mount, this step may need to be postponed until after you have completed painting your antlers for cosplay. The process I use to paint antlers for cosplay has so many steps, I decided to split it in to a second tutorial which you can view here.
In case your cosplay calls for securing your antler before paint, here is how I fastened my mount to the base:

Ta-da! Your antlers for cosplay are complete.
Here’s a look at the finished Pyromancer Crown once painted and mounted to my base:

I hope this post has been helpful for you! Feel free to contact me with any questions you have on making your own custom antlers for cosplay. When you’re ready to paint, be sure to check out my tutorial “Painting Antlers for Cosplay.”
Erei mu grind!
**Full Disclosure: I get credit when you purchase items via my Amazon links in this blog post! Any profits I receive from Amazon will go directly back into more blog posts and tutorials. Thanks in advance for considering a purchase 😀
