0

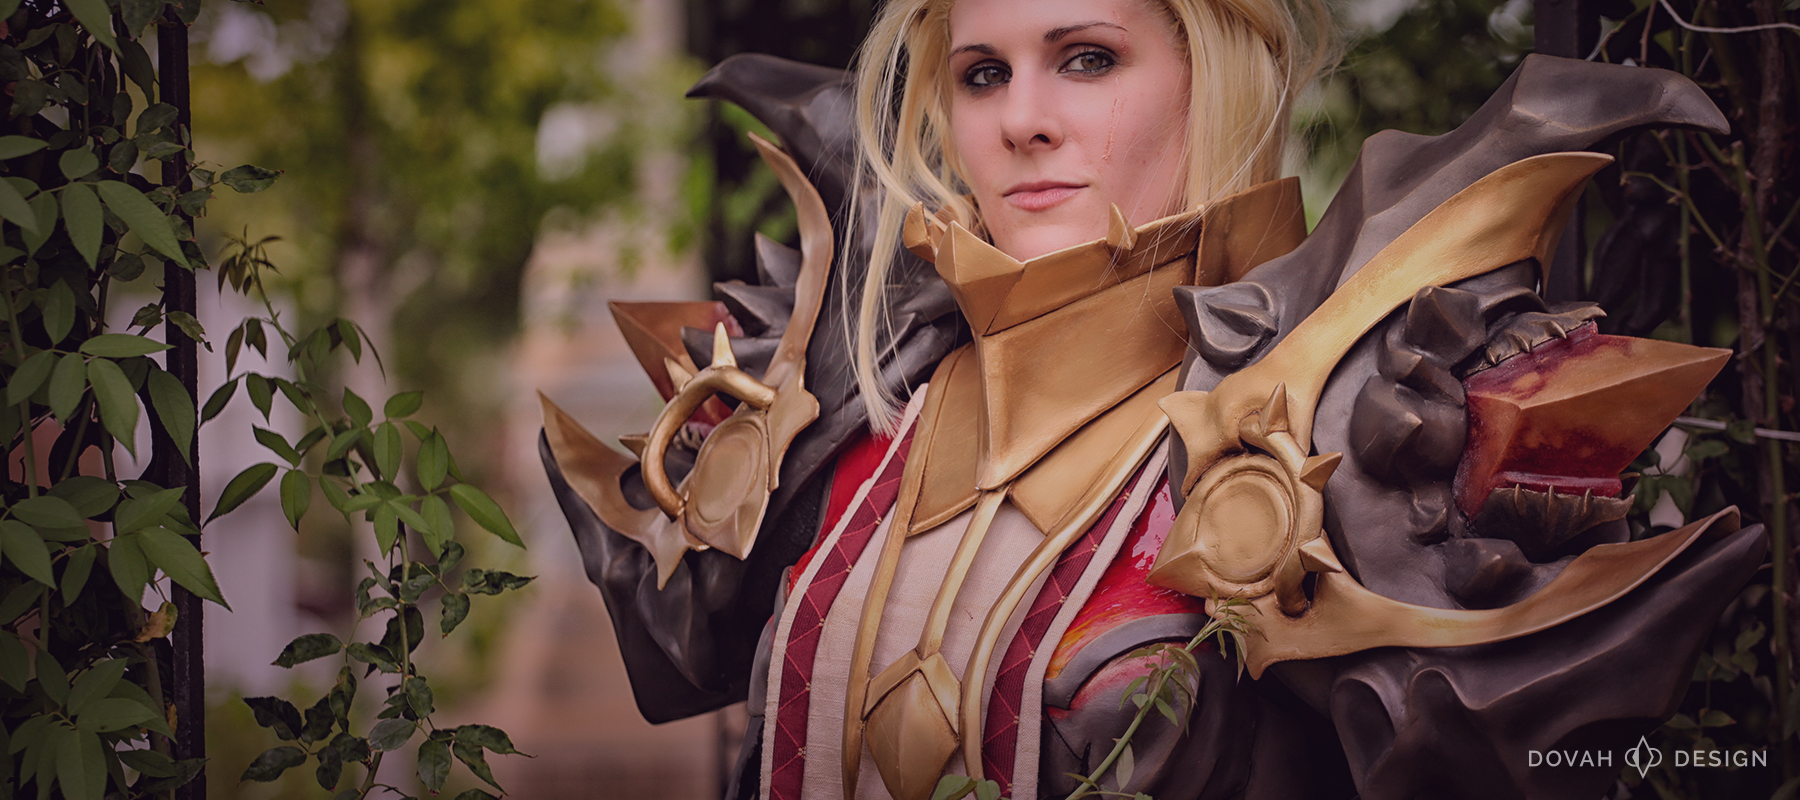
The Pauldrons of Akkhan have finally been perfected! It took me months to decide how to fix these giant pieces of armor, especially after the disappointment of their failure in 2015.  The goal for 2016 was to lighten the weight of each pauldron, recreate their glowing “spike” centers, and ensure each was centered on my shoulder when worn. I admit, I didn’t know where to begin!

Getting Rid of the Guts

After some careful planning, I decided to gut the existing pauldrons. Using a utility blade, I cut away the expanding foam and cardboard within each piece. This kept the outer “demon hide” portions of each pauldron intact, while giving me an instant reduction in weight. In this time lapse, you can see how I literally cored out the original pauldrons to make hollow “shells.”


Part of the reason this method was viable was because I originally coated each pauldron with a few layers of Smooth On’s Epsilon resin. This made the outsides quite literally “a hard shell” which could hold it’s own shape without the inside layers. I also coated the insides with another, single coat of Epsilon after this process was complete. Otherwise, gutting the pauldrons might not have worked out. Keep that in mind if you’re facing a similar project challenge!

Showing the cored out pauldrons after cutting out form and cardboard.

Making a Custom Rubber Mold

Once each pauldron was hollowed out, it was time to create a new “spike” for the centerpiece of each. Again I wasn’t sure where to start. I knew I wanted the new spikes to be much sharper and defined. I also needed each spike to be super lightweight, red, and just transparent enough to allow LED light to show through. After a lot of research, I settled on the brush-on rubber mold and slush cast method using Reynold’s SmoothCast 325. This was my first time making any sort of mold, and took a lot of time to research, but it was well worth the effort. I’ll add a list of materials and tutorials I used at the end of this post in case you are interested!
Here’s a few progress shots of creating the new spikes:
pauldron-perfect_diablo-3-armor-of-akkhan_mold-making-1_2016-10-16
pauldron-perfect_diablo-3-armor-of-akkhan_mold-making-2_2016-10-16
pauldron-perfect_diablo-3-armor-of-akkhan_mold-making-3_2016-10-16
pauldron-perfect_diablo-3-armor-of-akkhan_mold-making-4_2016-10-16
The basic principle of brush-on mold making is to create a single positive, coat it layer by layer with rubber to make a flexible mold, and then create a hard shell to contain the shape as you cast. You can see below from left to right, my positive spike, rubber mold, and 2 part plaster shell.
pauldron-perfect_diablo-3-armor-of-akkhan_mold-pieces_2016-10-16

Casting the Perfect Spike

Now that I had my rubber mold created, it was time to slush cast the positives. Before pouring the resin, I lightly sprayed in some Mann’s Ease Release 200, to make sure I was able to demold the positive. Then, to recreate the golden point of each spike, I lightly dusted the inside tip of my mold with Cast Magic powder in ‘Goldfinger.’ For resin, I chose Smooth On’s Smooth Cast 325, and added a few drops of so-strong red. I mixed approximately two ounces of resin per slush layer, and needed about five layers of resin for each pull. In the end I had three pulls to choose from, and had used an entire “trial unit” of SmoothCast 325.
Apparently this slush casting process was so tedious, I didn’t remember to take any good photos of my cast positives! The pulls resulted in semi-clear colored shells, perfectly shaped to match my original positive. Each had just the right amount of transparency to diffuse the LEDs inside. I couldn’t have been happier with the results! Here is a shot of one secured inside it’s new demon-shell home with gorilla glue.
Slush cast spike piece mounted inside a pauldron. Shows the gap left between the pauldron shell and cast spike.
NOTE: Once the first layer of resin is poured and “slushed,” the release agent and gold powder steps do not need to be repeated until you begin a new pour.

Filling in the Details

So the spikes were in place, but around each was a sizable gap from the remaining original shells. Wanting to keep them lightweight, I turned to spongey foam padding to build up the surrounding areas. I’m really not sure how best to describe these seemingly random spikes and points Blizzard designed for these pauldrons, but I’ll call them “demon details.” Heh.
Once these basic foam shapes were in place, I began covering them with a thin layer of Paperclay. Paperclay air-dries hard in just a few hours, and can be sanded to a smooth finish. Along with the spikes and points, I also used Paperclay to shape “demon mouths” around the red spikes. This portion is very difficult to see in game, so I took some liberty with the design. I admit, I’m very happy with the end result!
2-up photo of the gap left behind from coring out pauldrons. Slush cast spike is placed in the center, and foam is adding to fill the gap between the cast and pauldron shell.
Detail of the hand sculpted paperclay "demon details" on the pauldrons of akkhan prop costume piece.
The finishing touch for the spikes was adding the red LEDs. I used a string of  “fairy lights” pre-progammed with a slow fade. They also came with a remote control, so I didn’t need to reach inside the pauldrons each time I wanted to turn the lights on and off. To secure the string of fifty lights in place, I used hot glue inside of each spike. I only added glue in random intervals along the string, and curled the remaining loose pieces of metal wire up inside the spike to distribute light evenly. Check out the end result here!
Pauldron in progress, adding LED lights inside of slush cast spike.
So I had two of my three goals figured out: Each pauldron weighed significantly less than they previously had, and the spike centers were looking great. Now, how to get my new creations to sit properly on my armor?

Getting the Pauldrons to Stay Put

I knew I needed my shoulder to sit deeper inside the pauldron this time. So, I began by measuring and making a basic arched shoulder rest with craft foam. Craft foam was just the base, however. I sandwiched each foam piece in Worbla, then attached each Worbla piece at the right height inside of each pauldron. Turns out these shoulder rests were also perfect for mounting my LED battery packs! Now, to attach them to my cuirass.
Testing the size and fit of the pauldron shoulder rests with craft foam and spongey foam padding.
This solution took a lot of trial and error, mostly in the form of different fasteners. I had to ensure the fasteners were easy to attach and detach with minimal clearance, thin enough to be comfortable in my costume, and sturdy enough to hold each pauldron tight. The perfect fit came in the form of “center release buckles.” These are basic two part clips that function similar to parachute clips, but release with a single button on one side. This meant I could slip a hand easily in to clip the buckles tight, and release them with a light push on the top.

The final piece to this puzzle was attaching the buckles in just the right place. After testing, I decided each pauldron needed three nylon straps and buckles to remain stable. I sewed each the nylon strap to a D ring, then attached each D ring to the inside of the pauldrons with a scrap Worbla. Two buckles would attach to my cuirass shoulder straps, at the front-center of each pauldron. The third strap attached to the middle-back of each pauldron. These back straps buckle into the back of the cuirass, but on the opposite sides of my body. Essentially, the straps form an “X” across my back, which is hidden by the fabric tabard when the full costume is worn.

Sidenote, be sure to glue down raw edges of cut nylon strapping to keep it from fraying. I use Tacky Glue as it’s invisible and nearly invincible once dry.

Close up of nylon straps sewn to D rings. Each open end of nylon is glued to keep the loose ends from fraying.

NOTE: Once the first layer of resin is poured and "slushed," the release agent and gold powder steps do not need to be repeated until you begin a new pour.poop

Pauldrons of Akkhan laid on their sides, with the cleaned up underside visible. Each pauldron has three nylon straps, attached with D rings.
Sam testing out the pauldrons of akkhan, close up on face and pauldrons, smiling and giving a "thumbs up."
I honestly could not believe my eyes when the pauldrons finally stayed put! It was such a relief to have them actually working. After all the the D ring straps were attached, I covered the messy insides with black craft foam for a nice finish.

The Final Touches

The last thing to do was add the final touches. I sanded the outside of each pauldron for hours to remove as many imperfections as possible. Then coated with gesso, sanded some more, spray painted, and hand painted with acrylic. Whew! I’ll let you be the judge of the final results.

A before and after split shot of the Pauldrons of Akkhan costume piece. At left, the "before" version from October 2015. At right, the new and improved version from September 2016.

With the updated shoulders, armor pieces, and new paint job, this costume brought home the prize for “Best Use of Prop/Armor” at the 2016 DragonCon Friday Night Costume Contest. It’s such an honor to be recognized by some of the best in the industry. It makes the seemingly endless struggle to perfect these pauldrons SO worth it in the end. Now on to the next challenge!

Erei Un Grind — Happy crafting, everyone.


Resources for Slush Casting

  • This post by artist Nefeni Cosplay was a HUGE help in understanding the steps necessary to finishing my cast positive
  • The Dorans of Punished Props make it super easy to follow their detailed video on how to slush cast
  • SmoothOn has a super helpful step-by-step video for using Rebound 25 silicone rubber
Here is a list of the materials I settled on for my cast positive:

And the materials I used to make the cast:

NOTE: Check out my new and improved Armor of Akkhan with the updated pauldrons here.
This post is an update to “A Rift in the Pauldrons of Akkhan,” from February of 2016. With the finished pauldrons, I brought home the award for “Best Use of Props / Armor” from the Friday Night Costume Contest at DragonCon 2016, as well as “Best in Show” at MegaCon 2017!
*Full Disclosure: I get credit when you purchase items via my Amazon links in this article! Any profits I receive from Amazon will go directly back into more blog posts and tutorials. Thanks in advance for considering a purchase 🐲